
How Can We Help?
How can I schedule an invoice?
Follow these steps to schedule your invoices in Invoice Away.
1.To start, simply click on “Invoices” on the Side Navigation Menu.

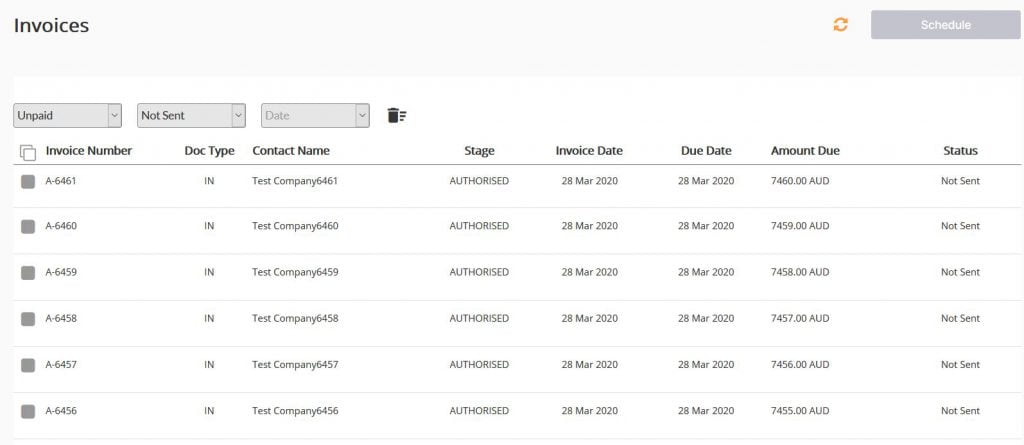
2. Once the page has loaded, you will see an overview of your invoices like below.
In this area you can sort the data by clicking on the column headers or by using the filters available to you to segment the invoices you wish to schedule.
3. As an example, we will go ahead and find invoices that currently have the status of “Not Sent” and “Unpaid”. Click on the dropdown selection for “Stage” and select “Unpaid”. Then click on the dropdown selection for “Status” and select “Not Sent”.
4.We then tick the invoices we wish to send and click on the Schedule button to begin the scheduling process.

5. A popup will display the invoices selected and the email address it will be sent to.
By default, we pull the primary person’s email address as setup in the contact in Xero, but you have full control as to whether you choose to send it to an alternate recipient, or to multiple recipients. You can edit this by going to the Contacts tab and editing the email addresses there.

6.Once you have verified that all the invoices have a valid email address, you can then choose the option of Send Now or Send Later for delivering your invoices to your clients.
Once you have setup your schedule, click on Next
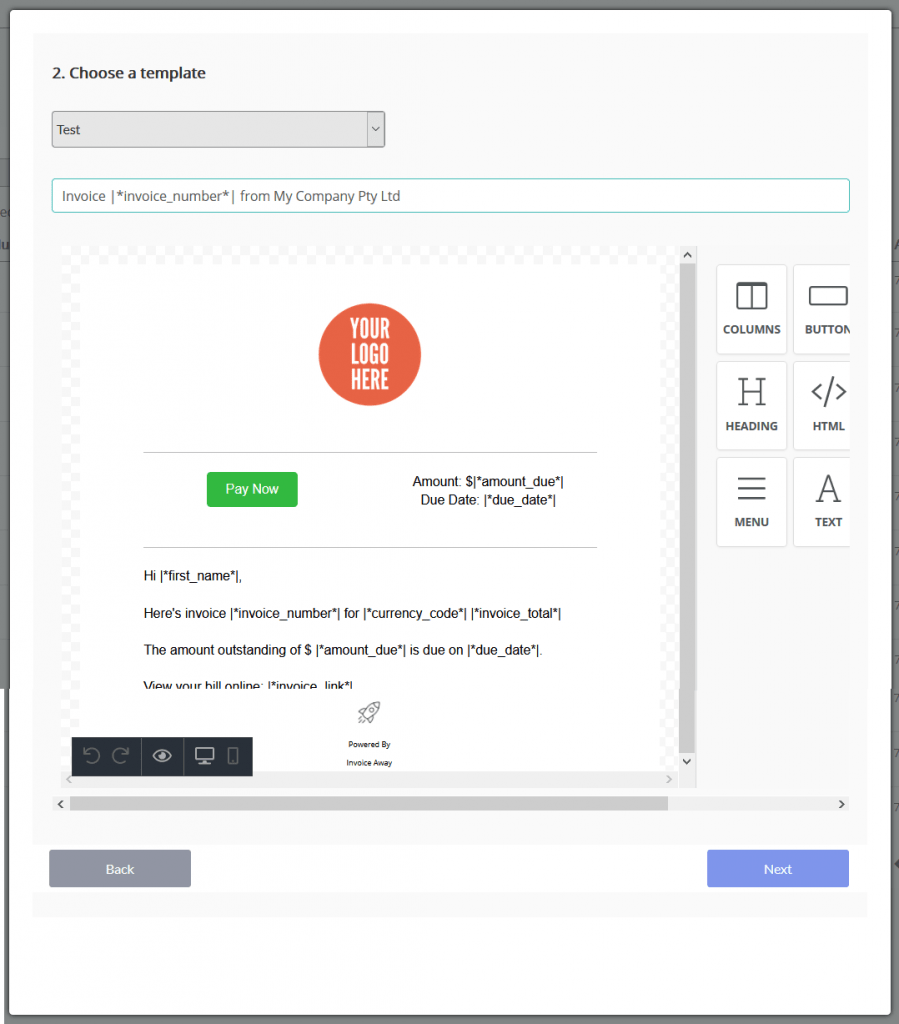
7.You will then be taken to the next page to choose the e-mail template you wish to apply. It is MANDATORY to have a template in order to schedule your invoices. See more on that here.
On this screen, we provide a preview of what your invoice template looks like (Xero placeholder values will be replaced on the actual email). You have the option to make further refinements if you so choose, but if not, you can click on the Next button
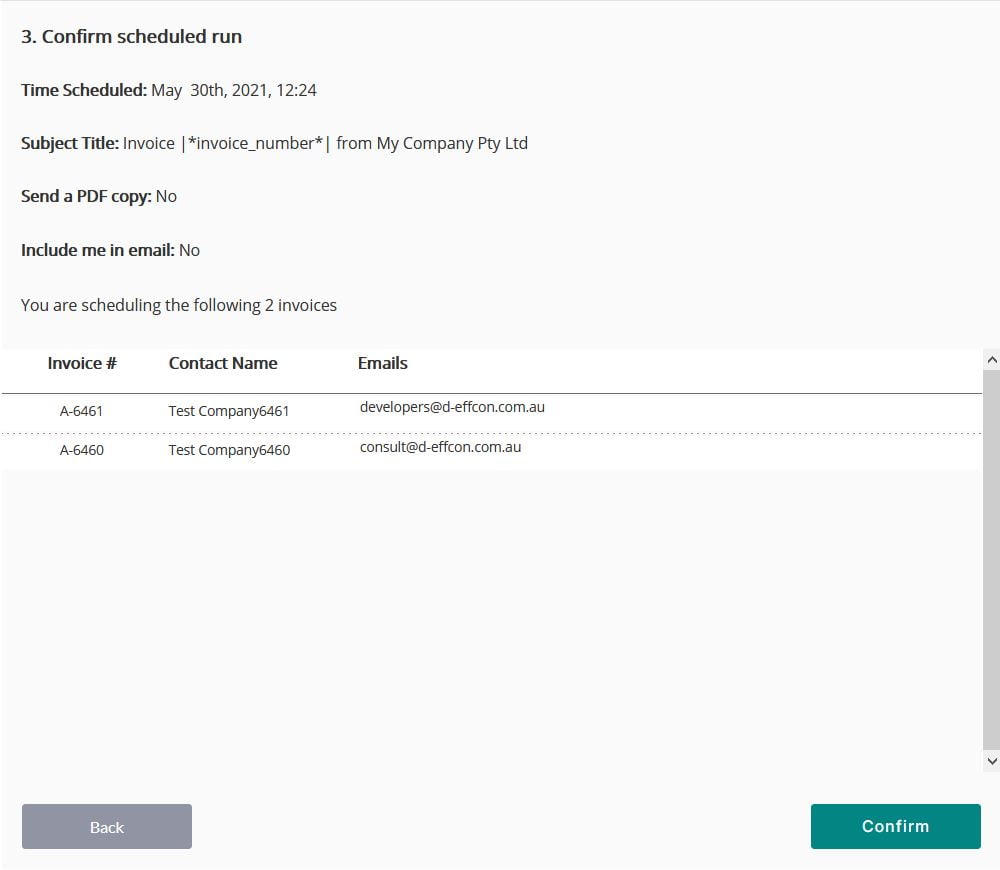
8.This final screen summarises the details you have entered and if you spot any errors, you can click on the Back button to rectify those errors. Once you are satisfied, you can click on the Submit button.
And that’s it you’re done!
To view invoices scheduled, you can click on Task Centre as displayed on the left-hand menu.
